
Ivor's boiler being filled
As with any day, there is lots going on and I have tried to capture a flavour of what's happening.
Due to its length, this posting has been split into two parts.
Locomotive preparation
Although Bressingham opens its doors to the public at 10:30, the drivers must arrive around 7:30 in order to prepare the locomotives for the day. The whole process can take up to three hours.07:30 Steam valve repair

Brian checks the new steam valve
07:45 Cleaning the boiler tubes

Cleaning the boiler tubes on
Rosenkavalier
Rosenkavalier

Steam oil provides a good seal
08:00 Raking the ash

Raking the ash
08:15 Lighting the fire, topping up the regulator and polishing

Lighting the fire

Topping up the regulator

Polishing the pipework

Beautiful colours forming on Rosenkavalier
08:30 Lubrication and cleaning

The fire is building nicely
A final glug of thick steam oil into the reservoir for the steam brake leaves just the motion to do a little later. Now that the fire is well and truly going it's time to fit the spark arrestor. This cage-like device is placed on top of the chimney and is intended to prevent any errant sparks from setting the line-side vegetation alight. When it's not quite so dry as today it is sometimes omitted.

Lubricating the steam brake

Fitting the spark arrestor
Spray polish is used to clean all of the paintwork, and the remaining copper pipework is polished off. With more coal being added to the fire, steam pressure is now starting to build.
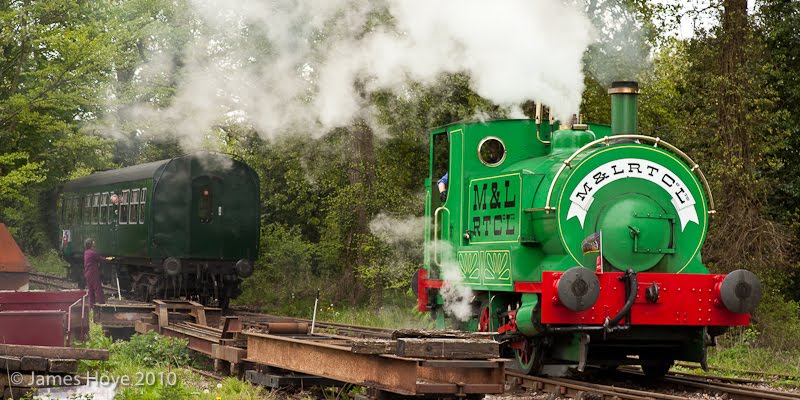
09:25 Pressure building

Just over 40psi, only another 100 to go!
In the lower right of the image the steam valve that Brian replaced earlier can be clearly seen. You can click the any image for a larger version. Use your browser's back button to return here.
09:30 More lubrication and more cleaning
One of the final tasks is to lubricate the moving parts, collectively termed the motion. A machine oil is applied to various points on the linkages and the axle boxes are topped up. Depending on the positioning of the wheels sometimes this cannot be completed until the locomotive has been moved forward a short distance to allow access through the spokes. Again, with this task it is an ideal opportunity to check various parts for damage or signs of wear.
Access to the axle boxes can be tricky

One of the many lubrication points
A paraffin soaked rag brings some colour back to the wheels and a final check round the locomotive gives it the all clear. It's amazing just how dirty a steam locomotive gets during the course of a day!
10:20 Preparation complete

Bronllwyd ready for the day's work
I thank Graham for allowing me to observe and ask lots of questions, and head across to the standard gauge to see if Ivor is ready.
If you would like to try your hand at driving a steam locomotive then there is a Driver Experience package available where you get to help prepare the locomotive before enjoying a minimum of two hours' driving.
Terms and conditions apply.
Terms and conditions apply.
Ivor has steam

Polishing the brasswork on Buster
the road roller
the road roller
Having previously experienced a ride on the road roller I will at some point try to shoot some video to give an idea of what to expect. One thing that won't be possible is to convey though is the sensation of riding on twelve tons of machine without any suspension.
Over the standard gauge crossing Ivor is just about ready to head down the line to be coupled up to the passenger carriage which is stationed by the Waveney platform.
Preparing to couple Ivor to the passenger carriage
Lots of progress on Bevan
With Ivor ready for duty and Bressingham's doors open to the public I grab my tripod and head for the workshop to check up on Bevan and get some better photographs (the last set were hand-held at ISO3200).Since my last visit much progress has been made on Bevan. The painted boiler that was covered up on a wagon in the engine shed has now been fitted to the chassis and looks great with its gleaming black paintwork. This time I have time and a tripod on my side so the pictures are much better and have a greater depth of field. For information I was shooting with a shutter speed of 10 seconds (and f/11 at ISO100).

Rear view of Bevan

Front view of Bevan

Right hand wheel and linkage

Oil reservoir for left hand piston

Bevan's cab ready for its next
coat of paint
coat of paint
Apparently Bevan was donated to Bressingham as a pair of axles, a boiler, smokebox and chimney, a chassis complete with cylinders but in need of repair and assorted parts like gauges and coupling rods, hence the term scratch build. Assemblies like the saddle tanks and driver's cab have been fabricated, and parts like the brakes, wheels, pipework and valves are all new.

Left hand saddle tank with top and filler neck painted black, awaiting its red and burgundy coats

Right hand saddle tank with burgundy applied and masked ready for the red coat
At this rate Bevan will soon be running, perhaps as early as July or August. As with everything, it depends on being fitted in around operational maintenance and repairs. Let's hope that not too many things break.
No comments:
Post a Comment
Please note that comments are moderated and may not appear immediately.